Broken window panes are not only unsightly but also pose a safety hazard and compromise the energy efficiency of your home. Whether it’s due to an accident, vandalism, or natural wear and tear, replacing a broken window pane is a relatively straightforward DIY project that can be tackled with the right tools and techniques. In this guide, we’ll walk you through the process of replacing a broken window pane like a pro.
Understanding the Importance of Replacing Broken Window Panes
Safety Concerns
A broken window pane poses a safety risk to occupants, especially if there are sharp edges or jagged fragments of glass. It’s essential to address broken windows promptly to prevent injuries and secure your home against intruders.
Energy Efficiency
Broken window panes compromise the insulation of your home, allowing heat to escape in the winter and cool air to seep out in the summer. By replacing broken panes, you can improve energy efficiency and reduce heating and cooling costs.
Assessing the Damage
Identifying Broken Panes
Inspect the window for any signs of damage, such as cracks, chips, or shattered glass. Pay attention to the condition of the surrounding framework and seals, as these may also need repair or replacement.
Inspecting Surrounding Framework
Check the condition of the window frame, sash, and glazing putty for any signs of decay or deterioration. Damaged framework can compromise the integrity of the window and may require reinforcement or replacement.
Gathering Necessary Materials and Tools
Glass Cutter or Knife
You’ll need a glass cutter or sharp utility knife to score and break the glass along the edges.
Replacement Glass
Measure the dimensions of the broken pane accurately and purchase a replacement piece of glass of the same size and thickness.
Putty Knife
A putty knife is used to remove old glazing compound and clean the window frame.
Glazing Compound
Glazing compound is applied to the window frame to secure the glass in place and create a watertight seal.
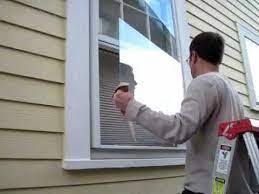
Removing the Broken Pane
Removing Old Glazing Compound
Use a putty knife to scrape away the old glazing compound from the window frame, taking care not to damage the surrounding wood.
Breaking Out the Damaged Glass
Score the broken glass along the edges with a glass cutter or knife, then carefully tap the glass with a hammer to break it into manageable pieces. Wear gloves and safety glasses to protect yourself from sharp shards.
Preparing for Installation
Cleaning the Frame
Clean the window frame thoroughly to remove any dirt, dust, or debris that could interfere with the installation process.
Measuring for Replacement Glass
Measure the opening in the window frame accurately to ensure the replacement glass fits snugly without gaps or overlaps.
Installing the New Pane
Applying Glazing Compound
Apply a thin bead of glazing compound along the inside edge of the window frame where the glass will sit.
Setting the Glass in Place
Carefully position the replacement glass in the frame, pressing it firmly against the glazing compound to create a tight seal.
Securing with Glazing Points
Insert glazing points or metal clips around the perimeter of the glass to hold it securely in place within the frame.
Finishing Touches
Smoothing the Compound
Use a putty knife or glazing tool to smooth out the excess glazing compound and create a neat, uniform seal around the glass.
Allowing Time to Cure
Allow the glazing compound to cure according to the manufacturer’s instructions before painting or applying any additional finishes.
Safety Precautions
Handling Broken Glass Safely
Handle broken glass with care to avoid cuts and injuries. Wear gloves and safety glasses when removing and disposing of broken panes.
Using Protective Gear
Use protective gear such as gloves, safety glasses, and a dust mask when working with glass, glazing compound, and other materials to prevent accidents and exposure to harmful substances.
Conclusion
Replacing a broken window pane is a manageable DIY project that can improve the safety, security, and energy efficiency of your home. By following the proper steps and safety precautions outlined in this guide, you can tackle this task with confidence and restore your windows to their former glory.